


Your Visit
We’ve put together a one-page resource guide for new and established patients offering recommendations and tutorials on booking, appointments, Patient Portal, and more. We recommend all patients review Make the Most of Your Appointment, providing an easy checklist as well as SWOFM Tips on how to make your appointment work best for you. New patients interested in becoming part of our practice can visit our Getting Started section for how to book an appointment. Established patient can visit our Online Booking Tutorial section for a step-by-step guide on booking your appointment online. All patients should review our Patient Portal Tutorial walk-through to familiarize themselves with our online portal, which allows patients to review their medical records, lab results, request prescriptions, message their clinicians, and so much more.
Make the Most of Your Appointment
Make the Most of Your Appointment
Whether you are a new or established patient, we’ve put together a quick and easy checklist to help you prepare for your appointment.
Step 1: Book Your Appointment
When you book your appointment, let us know the reason for your visit. You can leave detailed comments when you book online through our website or tell us over the phone if you call in to schedule.
SWOFM Tip: Delays are often felt when there are surprises during an appointment. It’s helpful to share your thoughts and concerns with us when scheduling your appointment. This helps save you time during your appointment, so you have more time to spend with your Clinician.
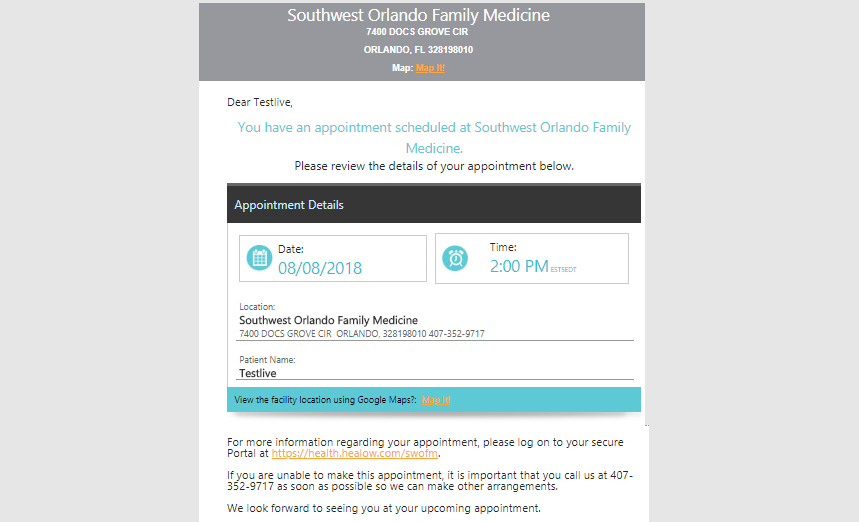
Step 2: Set An Appointment Reminder
After scheduling your appointment, write down the appointment date and time in your calendar. We will call to remind you about your appointment, but it’s always a good idea to keep track of the appointments you’ve scheduled.
SWOFM Tip: Set a reminder in your calendar a few days before your appointment. When the reminder pops up, make sure you have the appointment time, address, and phone number ready so you can be fully prepared on the day of your appointment. This is also a great time to make sure you’ve filled out any health questionnaires required for your visit in the Patient Portal.
Step 3: Write Down Your Concerns
Come to your appointment with a list of concerns you’d like to review with your Clinician. You can write them down on a piece of paper or take notes in your phone. Try making a list of the top 2 or 3 issues you’d like to address during your visit. Don’t forget to bring pill bottles for any medications or supplements you are currently taking.
SWOFM Tip: Taking the time to list your concerns in order of importance helps you stay focused during your consultation so you don’t forget anything important while you are with your Clinician. There may be times where certain health concerns take priority over others, making it necessary for a follow-up appointment to address your remaining healthcare needs. Our Clinicians need to know what medications and supplements you’re taking in order to provide you the best healthcare possible.
Step 4: After Your Visit
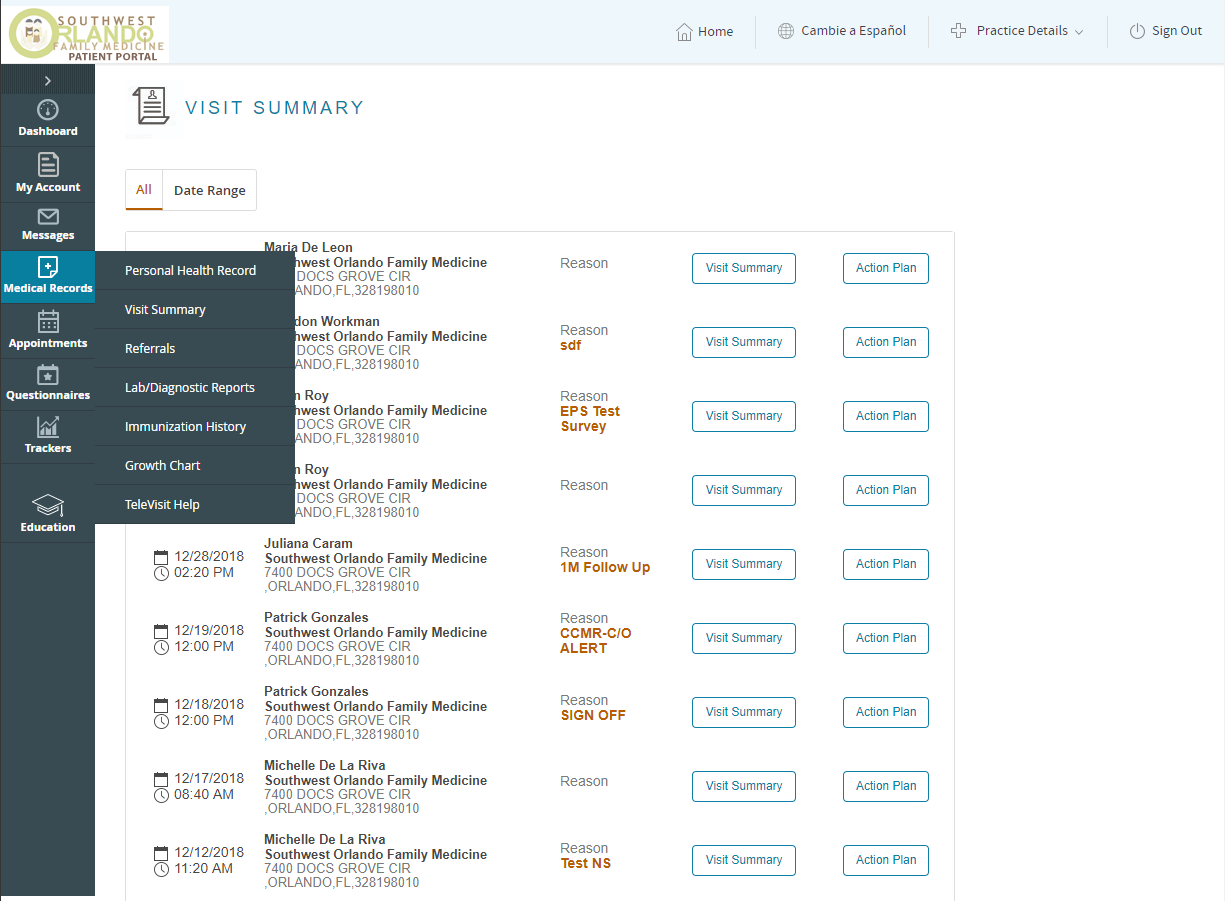
Congratulations, you’ve finished your appointment! Be sure to read your Visit Summary in the Patient Portal after your visit. Your Visit Summary has notes from your visit along with any recommendations your Clinician has for you, based on your appointment.
SWOFM Tip: Your Patient Portal shows your Visit Summary, Lab Results, Prescription Refills, and more. You can also send a secure message to your Clinician if you have any questions. Patients who use Patient Portal or the Healow App have easy access to healthcare at their fingertips.
Getting Started
Getting Started
On the SWOFM.com site
- Select the Book Appointment link.

- Select the New Patient icon.
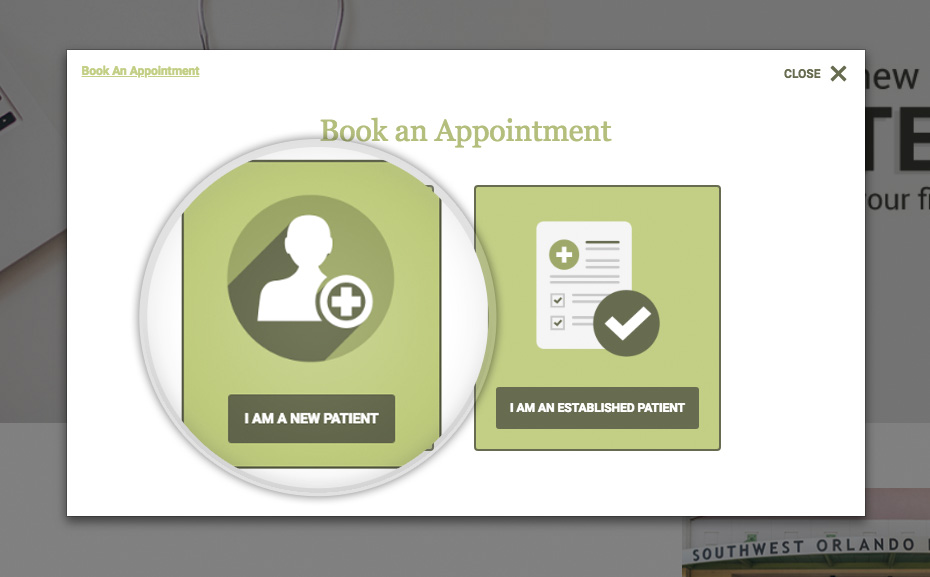
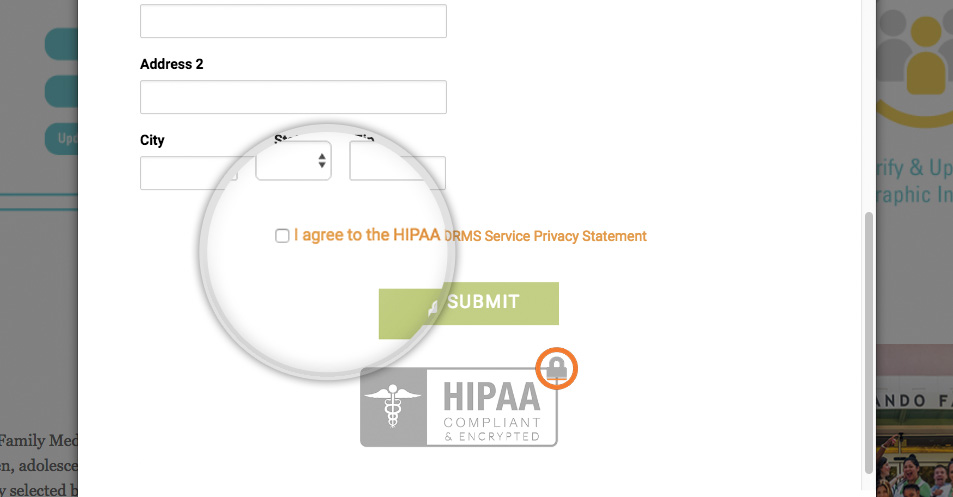
- Fill out the New Patient form.
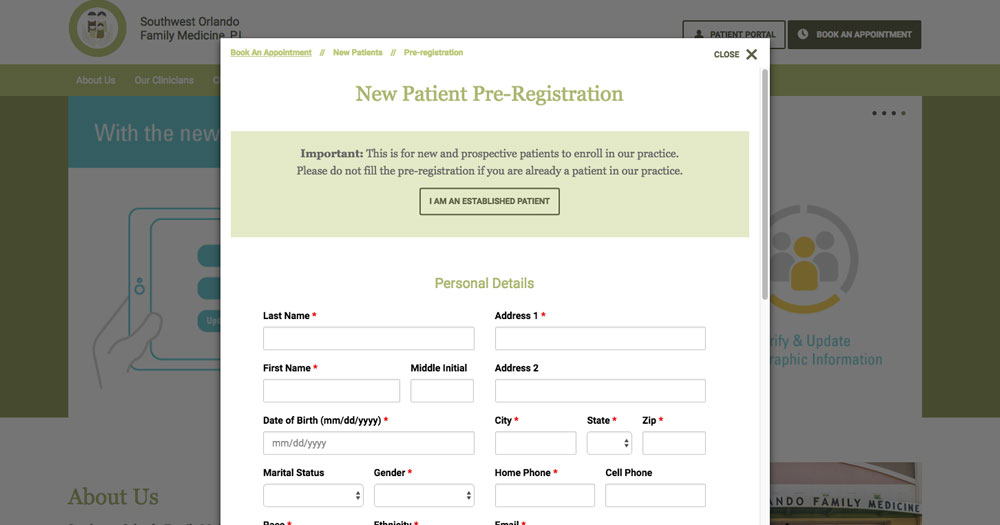
Make sure you check the box labeled “I agree to the HIPAA FORMS Service Privacy Statement”.
If you’d like to review our Privacy Policy, click here.
- On the next screen, Select a Clinician.
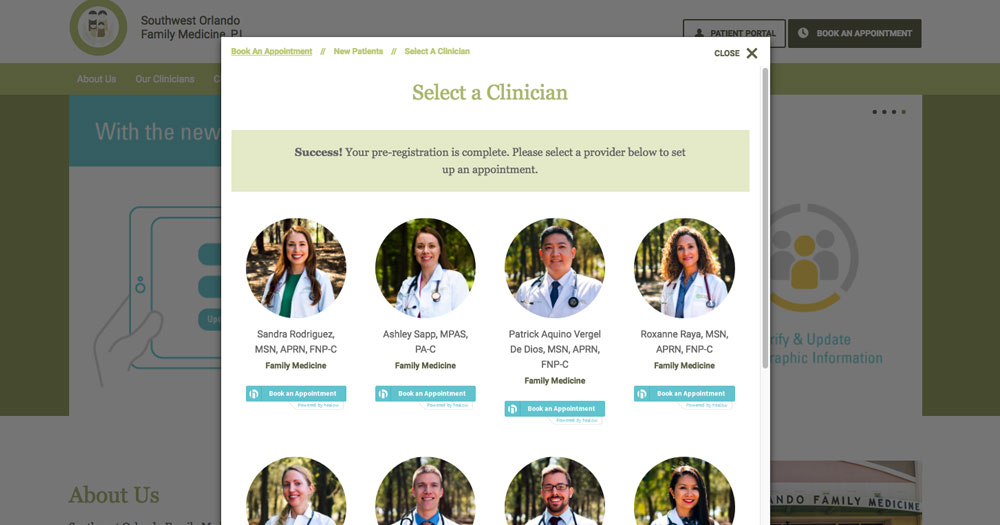
Selecting a clinician will open a new browser window. Follow the steps to select an appointment with your chosen provider. Once you’ve selected your appointment, you can close the appointment window and return to our website.
- Expect a confirmation email from us!
This email includes your username and password for Patient Portal.
If you signed up within regular business hours, expect an email within a few minutes.
If you signed up outside these hours, expect an email by the morning of the next business day.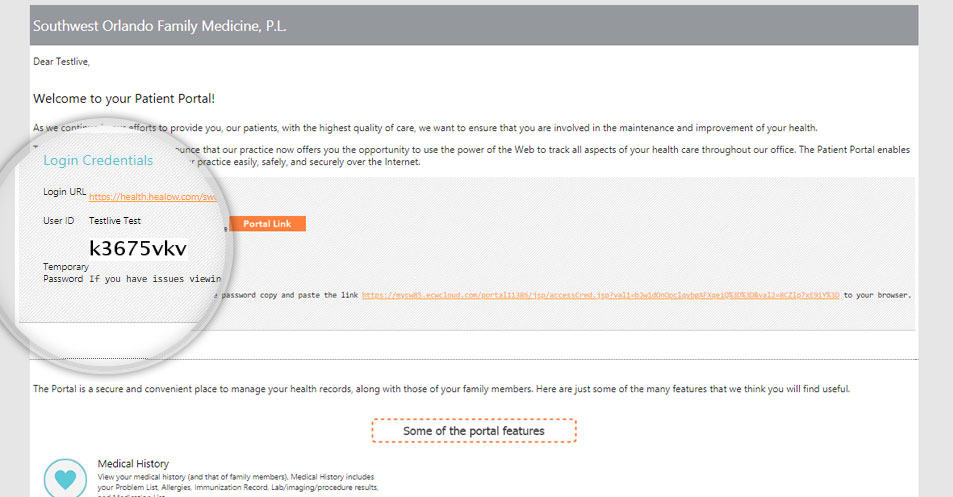
In Patient Portal
- Log in to the Patient Portal by clicking on the button in the header.

- Check your Patient Portal Messages

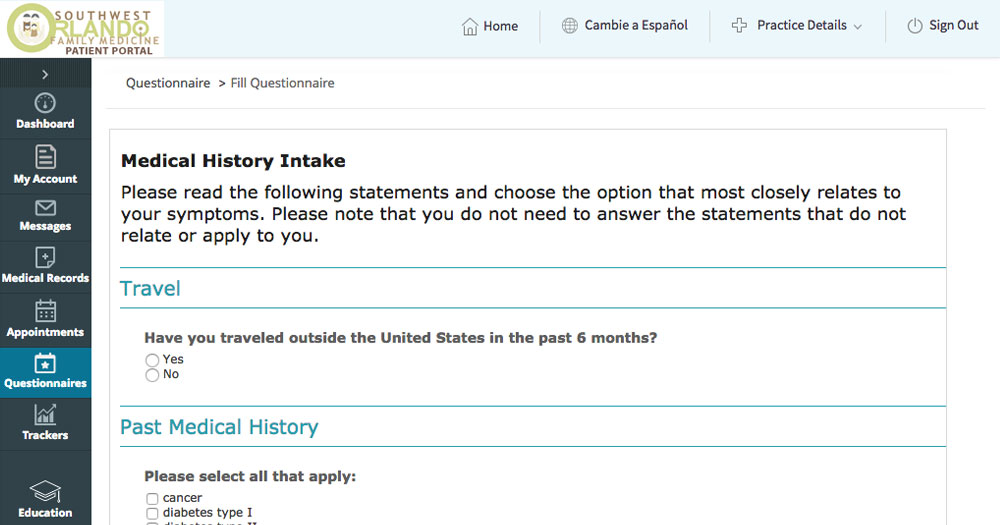
- Fill out the Medical History Questionnaire


 You can also fill out any other forms that pertain to your visit.
For instance, if you’re coming in for a Physical Exam, you need to fill out a Review of Systems – Physical Exam Questionnaire. If you are insured by Medicare, please fill out the Review of Systems – Medicare questionnaire.

- You’ll receive a confirmation notification from us that all your pre-appointment documents have been completed.
Before Your Appointment
- Two (2) days prior to your appointment, we’ll reach out to you on the phone. Now’s a good time to save our phone number so you know to answer our call! 407-352-9717.
- You’ll be prompted to press 1 to confirm your appointment, or 2 to reschedule.
- Keep in mind that any appointment cancellations within 24 hours will incur a fee based on our Patient Policies.
- The day before your appointment, we’ll reach out to you via text message and email. (We’ll reach out to you via phone if you haven’t confirmed your appointment with us yet).
- This is just to remind you that your office appointment is coming up!
On The Day of Your Visit
- We ask all new patients to arrive 20 minutes prior to their appointment time.
- What to expect at the office:
- Check in at one of our kiosks once you arrive
- Our staff will provide you with new patient documents that require a signature. If you’d like to print and fill these forms out in advance, they can be found here:
- You are now completely checked in and ready for your appointment!
After Your Visit
- After Your Visit
- Your Visit Summary will be available on the Patient Portal within 72 hours.
- Any lab work or in-house diagnostics take an average of 7 business days for review.
- Personal Health Records, Patient Education, Prescription Refill Requests, and more can all be accessed via the Patient Portal.
Online Booking Tutorial
Online Booking Tutorial
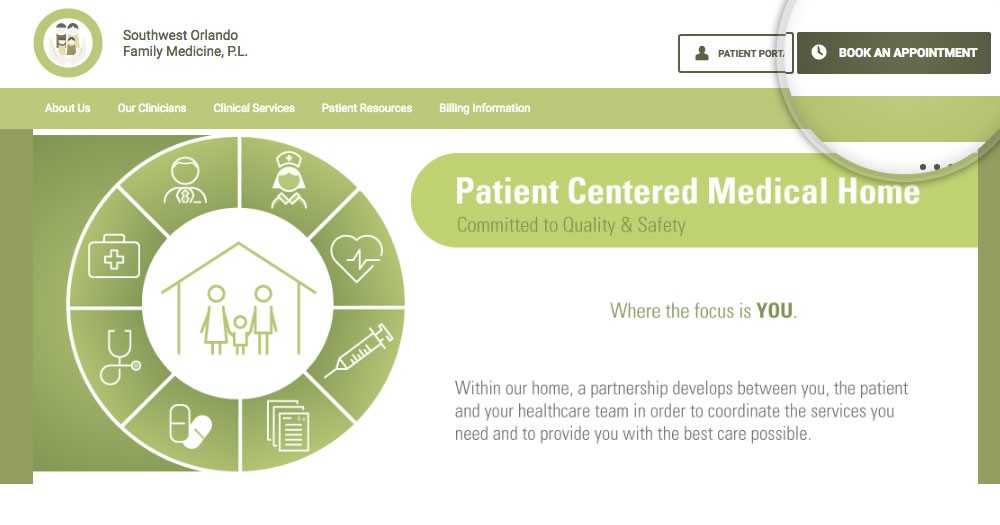
For Established Patients, booking your next appointment through our Online Booking takes only a few minutes! To get started, select the Book An Appointment button at the top of the page.
 Next, select I Am An Established Patient

Not an Established Patient? That’s okay! Visit our Getting Started tutorial for how to set up your first appointment as a New Patient.
Established Patients can select a Telehealth Appointment or Regular Booking.
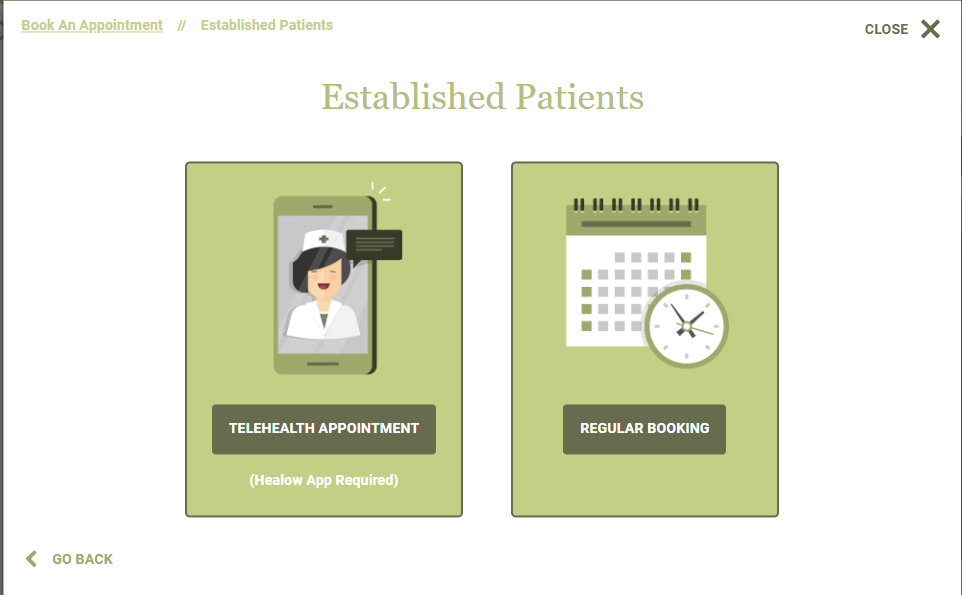
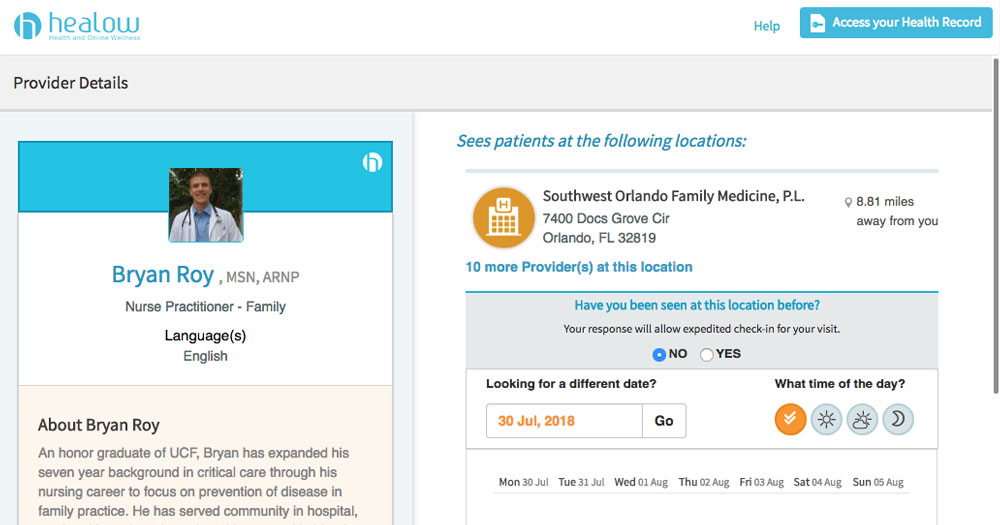
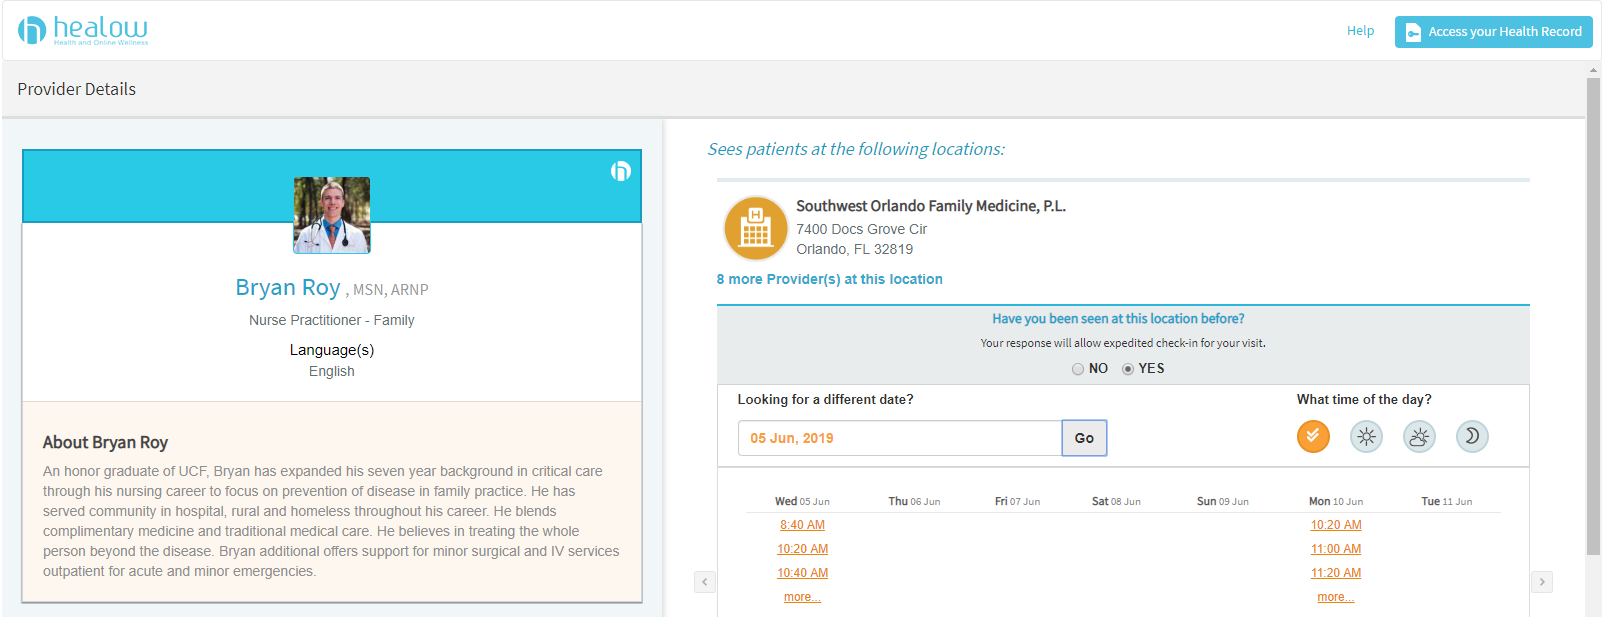
After selecting Regular Booking, select your clinician to set an appointment.

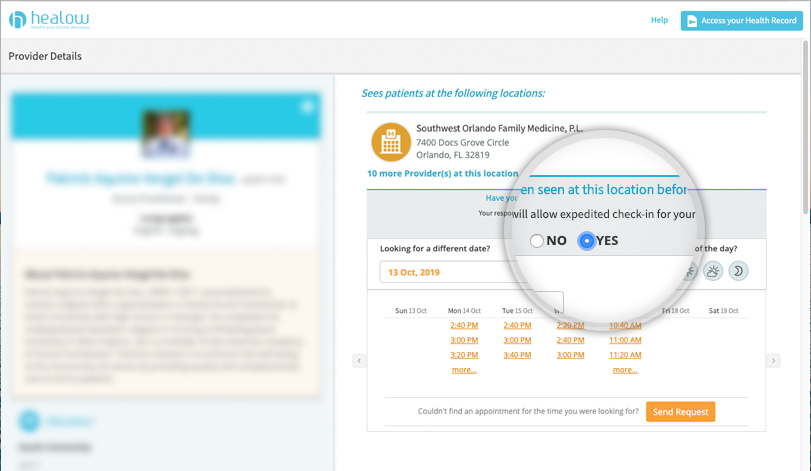
Once you’ve selected your Clinician, you’re only 4 short steps away from completing your appointment registration. Be sure to select YES under “Have you been seen at this location before?” if you are an Established Patient.
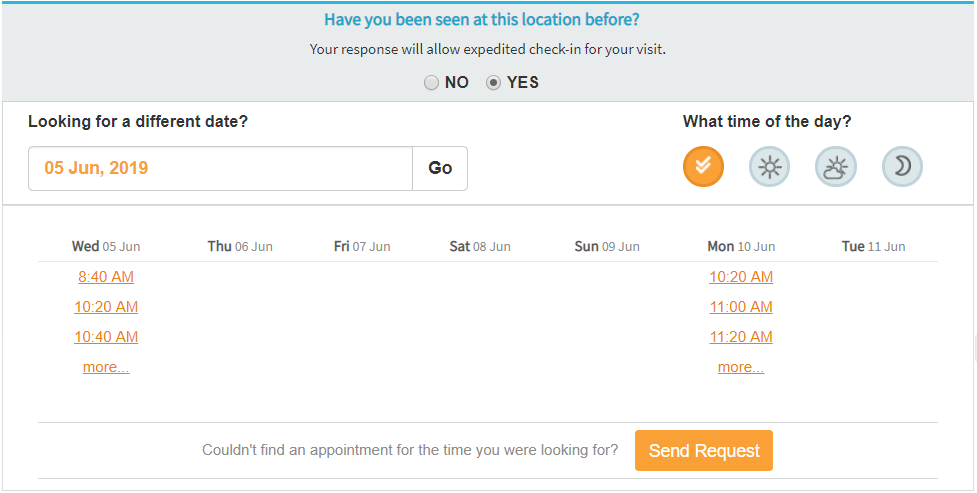
Step 1: Select Provider
Once you’ve selected YES, you can view upcoming clinical availability and schedule the date and time that work best for you. If you don’t see an available time and date that’s open, you can send a request and our staff will respond with the next closest availability.
Step 2: Patient Details
Fill out the patient information on this page with your name, email, date of birth, contact number and gender.

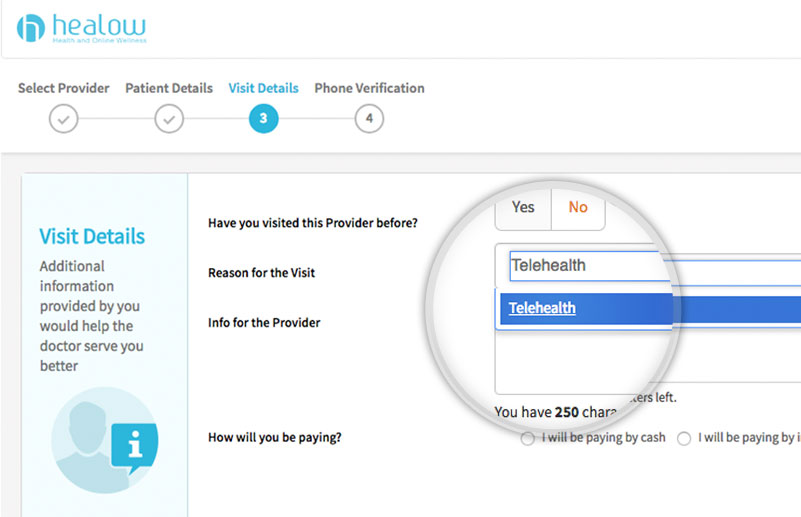
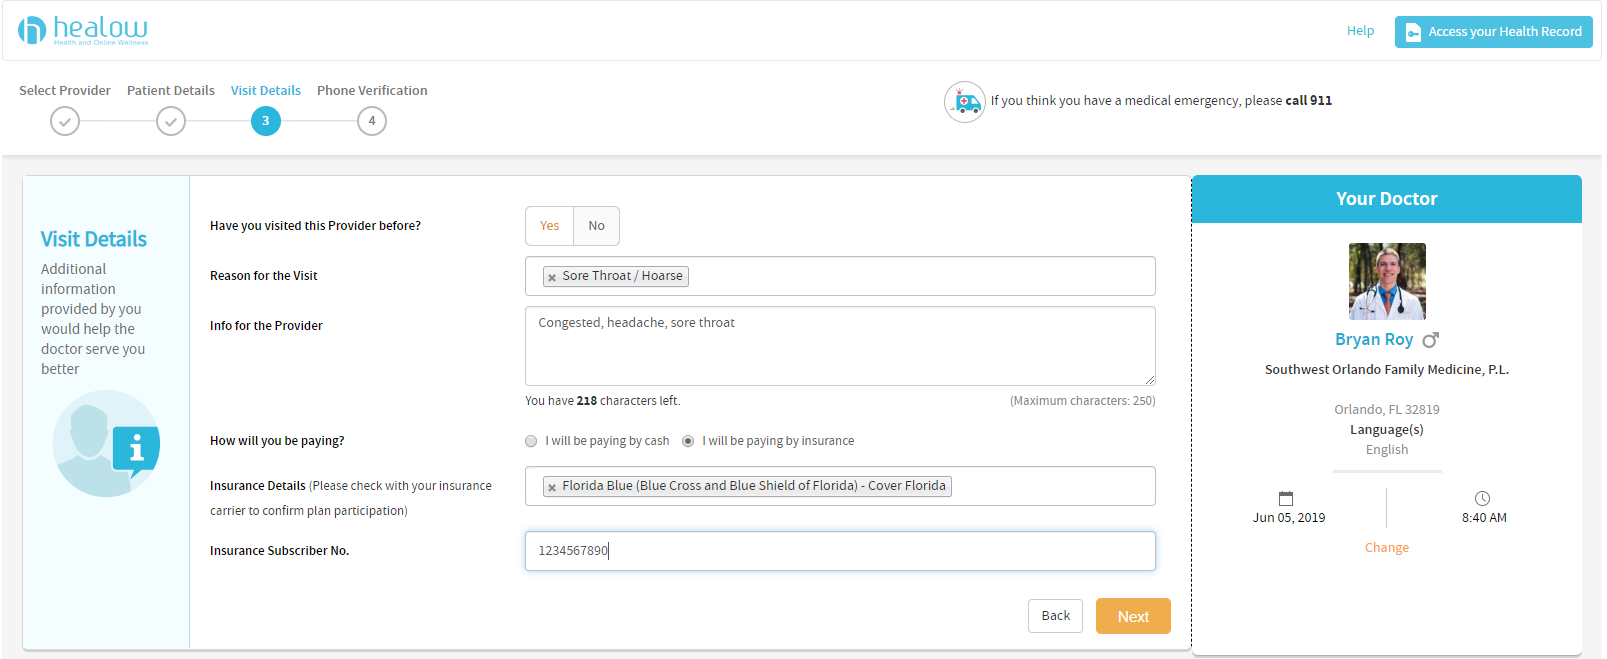
Step 3: Visit Details
Be sure to select the appropriate answer under ‘Have you visited this Provider before?”
Next, select your Reason for Visit from the dropdown menu, and leave a note with any relevant information on your upcoming appointment. This information helps us prepare for your appointment in a timely manner and lets us know what concerns you have. Learn How to Make the Most of Your Appointment here.
Select your payment method and fill out your insurance provider or self-pay information and hit Next.
Step 4: Phone Verification
You’re almost done! Please review the patient and appointment information as well as your Clinician and your appointment date and time. Then, select the best verification method for you. Once you’ve entered your Validation Code, you’re all set! It’s a good idea to mark down your appointment date and time in your calendar. We will also reach out to you to remind you of your appointment.

Patient Portal Tutorial
Patient Portal Tutorial
Welcome to Patient Portal! Accessing your records, visit summaries, referrals, lab results, and prescription refill requests is fast and easy with the Patient Portal.
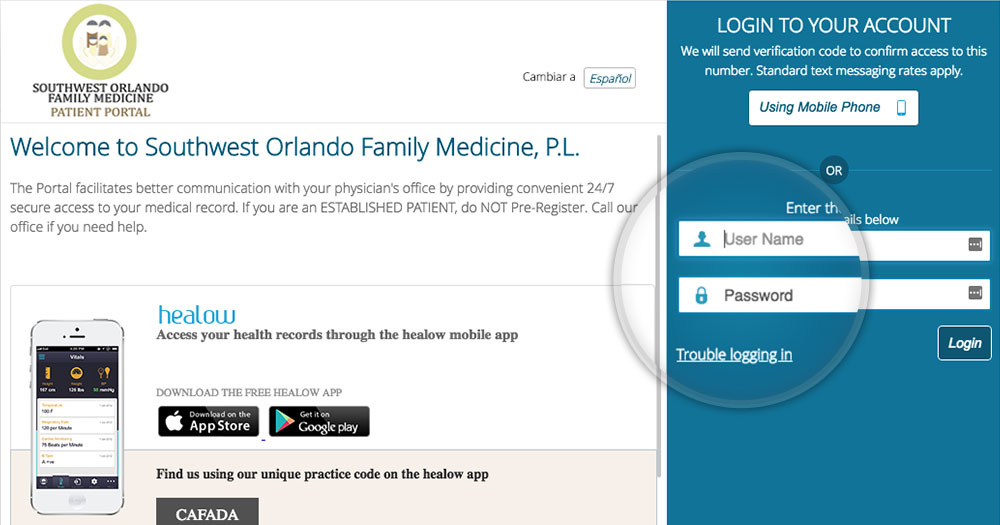
Go to www.swofm.com and select the Patient Portal button on the top right of our website to be redirected to the Patient Portal Login page.

Enter your user name and password and click Login to access your Patient Portal account.

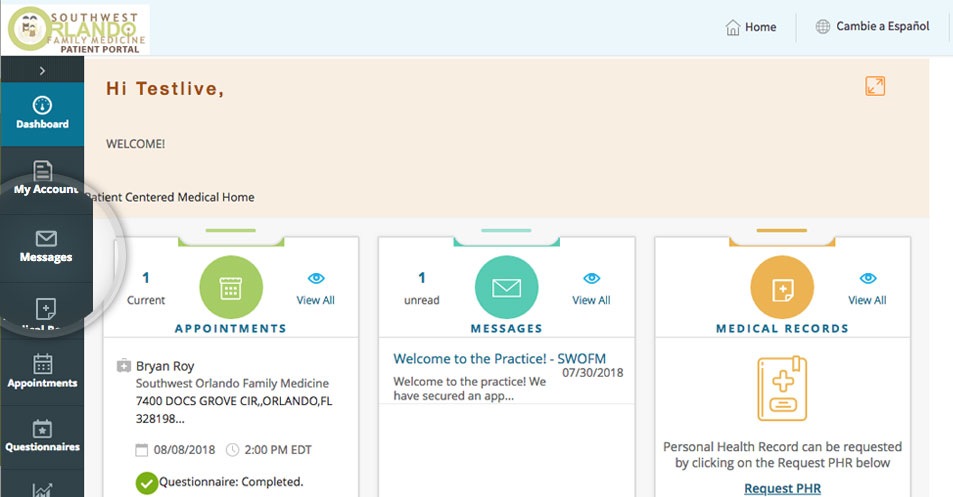
Once you’ve logged into your Patient Portal, you’ll have access to your Dashboard, giving you an overview of your appointments, messages, medications, lab results, medical records, and more. You can navigate to these various pages on the Dashboard or with the menu on the left side of your page.
Dashboard
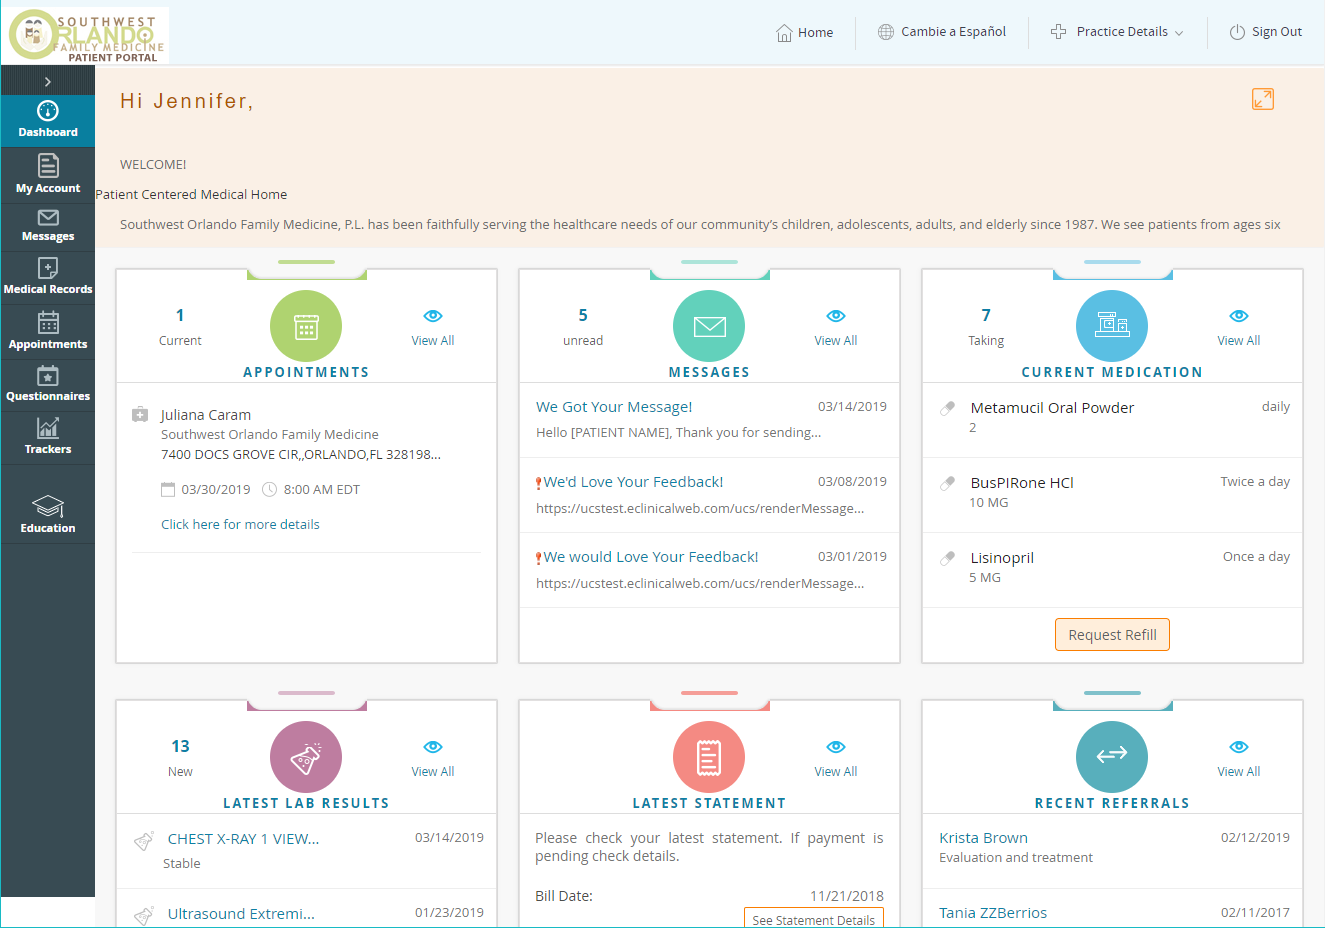
Next, we’ll review each of the Menu options below. Click on a menu name to jump to that tutorial:
My Account, Messages, Medical Records, Appointments, Questionnaires, Trackers, Education.
My Account
Messages
Medical Records
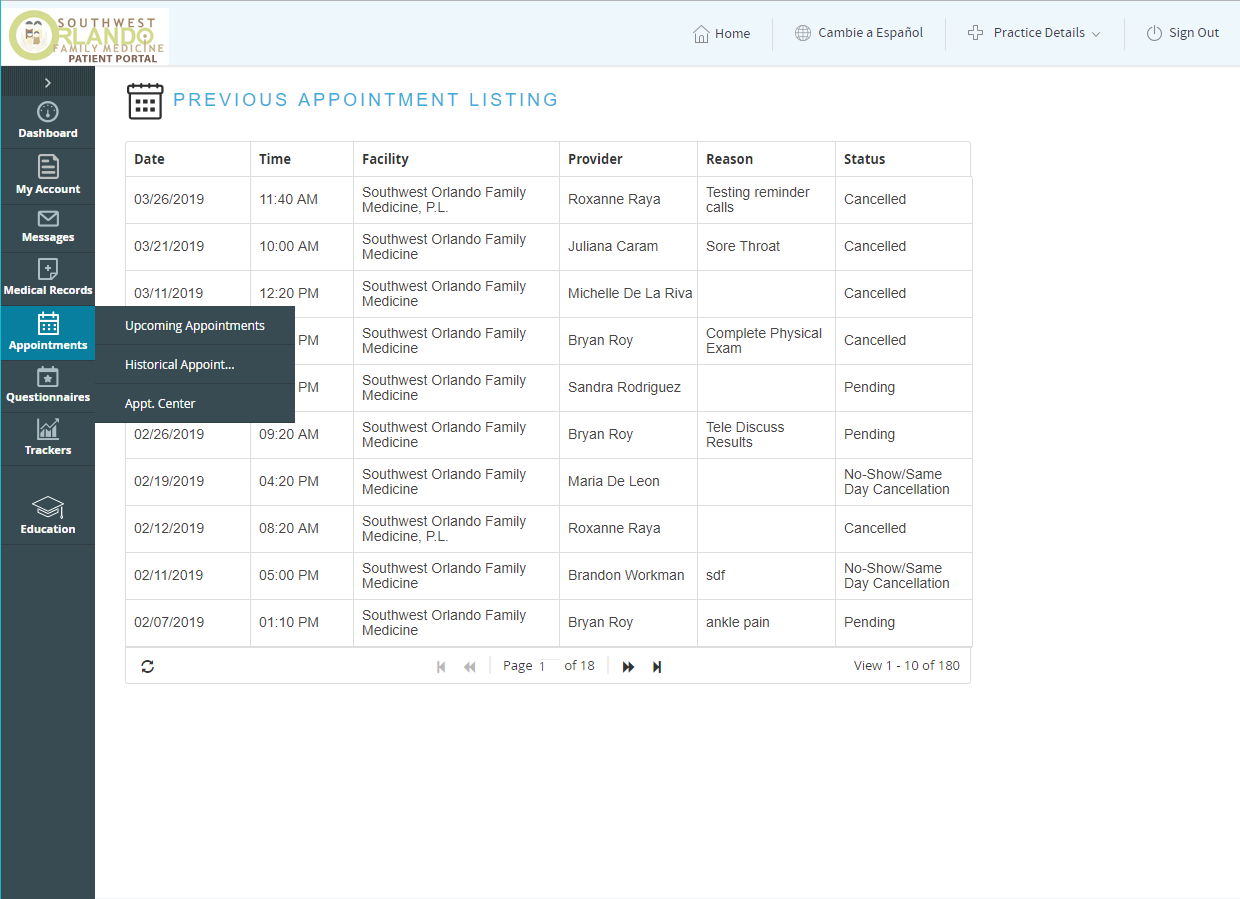
Appointments
Questionnaires
Trackers
Education

Messages

Medical Records
Appointments
Questionnaires
Trackers
Education
Appointments
Questionnaires
Trackers
Education

Trackers
Education

Healow Video Tutorials
Healow – Online Booking for Established Patients
Healow – How to Download the App
Healow Review Visit Summary
Healow Refill Requests